In ShipX, the dynamic nature of the system allows company to be used as a base class to cover all company types. This includes Billing Customer, Shipper Consignee, Port, Depot, Forwarder, etc.
Step 1: Basic Company Details
To create a company, go to Manage > Companies.
Click on the button to create a new company.

Fill in the fields accordingly:
- Code: A unique code used to reference the company.
- Company name: The display name for the company.
- Description: Any additional description to be attached to the company.
- Company Types: Choose company type(s) among the available choices:
- Billing
- Customs
- Depot
- Forwarder
- Freight Forwarder
- Haulier
- Liner
- One Time Vendor
- Port
- Service Company
- Shipper Consignee
- Shipping Agent
- Transit Yard
- Transporter
- Vendor
- Warehouse
- Bill To: If a billing party for jobs for this company already exists as another company in ShipX, select one.
- Currency: Currency used in invoices for this company.
- Country: Country in which jurisdiction the company is registered in.
- Tags: Labels relevant to the company.
One you've filled up the form, click to create the company.
Step 2: Financial Details
Once your company is created, scroll down and you will see a section called 'Codes'
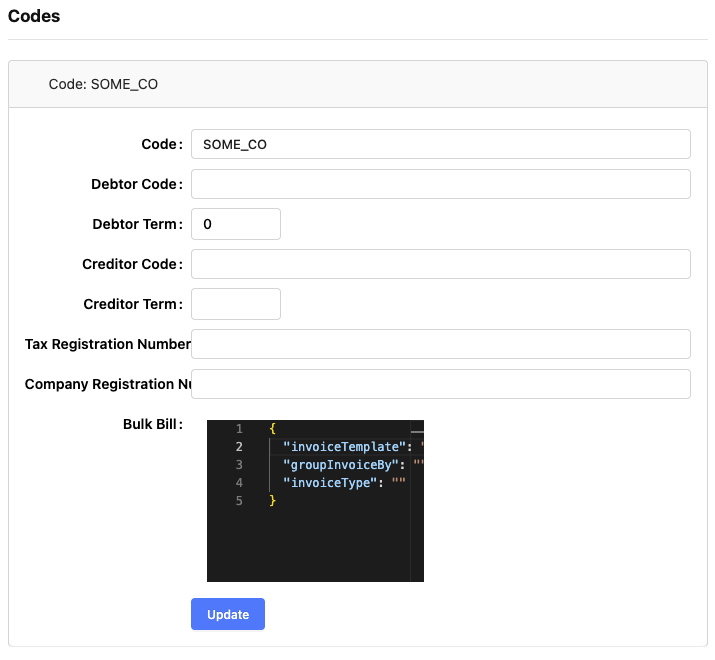
Fill up the fields according to the relevance:
- Code: Company Code. Same as above. Do not change.
- Debtor Code: Reference for Sage integration.
- Debtor Term: Payment term for the debtor account.
- Creditor Code: Reference for Sage integration.
- Creditor Term: Payment term for the creditor account.
- Bulk Bill: Refer to this article